Sunday, February 5, 2012

Free Valentine Printables...............

If your anything like me, I wait till the last minute to buy my kids Valentines cards for their school classes. So I designed some you can print for free! Just click, and when you see the large image you can print them! Add some glitter, and there ya go, some cute free Valentine Cards from the convenience of your own home! These print wonderfully on Clear transparencies which you can then stick on glass jars or votive holders for some wonderful little Valentine home decorating items, or give one to each of your friends!


I hope you enjoy the endless possibilities you can use these with! :) 

Tuesday, November 22, 2011

Christmas Time.....

I always get so excited for Christmas time. I get in the mood to start baking and crafting. I have some really fun ideas to make your own Christmas ornaments. I also have some great Christmas hang tags for everyone to copy and print! My hang tags also look great to hang on your tree!

Free Christmas Printables, just click on the image, and when it appears larger, choose your save as option or your print option! Have fun crafting! I would love for everyone to send me photos of what they made with my collage sheets! :)


Friday, October 14, 2011

It is the fall season at last...........

FREE Halloween Printable crafts.

The cool fresh air, colors changing, pumpkin patches and haunted houses. I'm so excited for this time of year. I LOVE IT. Its my favorite time of the year. Im in the mood for some more crafting. Below are some Vintage Ephemera Halloween designs I came up with a couple of years ago. There are a couple of hang tag sheets, and Halloween luminario sheets. You Print them out on paper, or clear transparencies, then get some spray adhesive and attache them to some jars. Put a candle in them and WAALLAAA you have some cool halloween gifts, or home decorations.


Just click on the images above when they appear larger on your screen you can print them from there, or choose your "save as" option, and save them to your computer! 

Sunday, July 10, 2011

What a busy summer.........

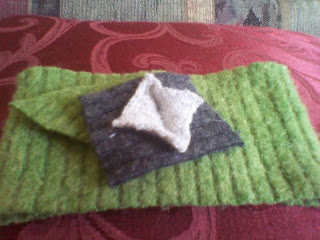
Oh my goodness, my summer has been crazy. I was looking forward to school being out so I wouldn't be so busy and now this summer, I've been even busier that during the school year! I've been having so much fun with my kids. Everyday we seem to find something to do, and I haven't had the time to even post to my blogs. I decided I needed to find a way to make money this summer so this last week I worked very hard on making some handmade items for the Provo Farmers Market! I decided to try headbands, baby booties, and some apparel out of recycled clothing! I will post pictures, tell me what you think!

I had bags of clothing that my family doesn't wear anymore, wool sweaters, t-shirts, and such. So I thought what the heck, perhaps I can make some stuff out of these clothes. I was pleasantly surprised at just how many cool things you can make with old recycled clothes. I used the wool sweaters for some of the headbands and baby booties. I also made some yoga headbands with my stretchy t-shirts, in one day, I sold almost $100.00 in mostly headbands, at the Farmers Market! They were super easy to make, and I can't believe what a hit they were!


Thursday, June 23, 2011

Very Primitive Americana Hats..............

I came up with the easiest and funnest craft project a couple years ago. You know how every season you find the weird hats, that no one really ever wears at the dollar stores? I've seen Fourth of July hats, and St. Patricks day hats, they are the ones that are made with felt!
WEll, no one ever really wears them, I came up with this easy and fun craft project, even a 3 year old can make. Check these out! Anyone can make these, all you need is some cotton, glitter, a few buttons or some little bells, and some brown paint with a paint brush, and as I always say  GLITTER!!
 You can actually rust the little craft bells you get at the craft store, by simply putting them in a bowl or cup of Coke for a couple of days, thats how I rusted these little bells, instead of bells old buttons look great as well. I also hung some of my printable tags on these hats, to give them even more of a fun look!

Simply take your dollar store hat, stuff it with cotton, if you want you can hot glue a piece of fabric underneath to cover your cotton hole. Then glue on some buttons wherever you want. Dilute your brown paint with water, paint your hat all over where you want the aged look to be with your diluted brown paint and water. Then Sprinkle glitter all over it! There you have it, an old primitive looking hat. Perfect for the Fourth of July or any Americana home decor! Perfect for setting on the table some where as a decoration! :) 

Saturday, June 11, 2011

Before we know it.............


The 4th of July will be here before we know it, so I have dug out my collection of old antique military poster images. There are several craft projects you can do with these collage sheets. You can print them on card stock paper and put them in little frames, I have also deco- paged them to wooden blocks and added glitter and used them for candle holders, or shelf sitters. There's a lot you can do with them. You could even print them on iron on transfer paper so you kids can iron them on some 4th of July t-shirts. Iron them on white cotton fabric and sew little pillows even. There are endless possibilities! Here are pictures of a couple things I've made with them.

 In the photo above, I simply printed the images, then I cut 4 by 4 pieces of wood into these blocks. Then you paint them as you would like. Sand, after your paint dries until you get the aged look. Then you decoupage your picture on the block. Drill holes in the top, to fit the size of your candles! Then add lots of glitter. These add a very nice primitive touch to any home decor!
 I created these little chalk boards with antique photos of little children. I will offer printables for some antique kids photos as well! To make these you cut out pieces of wood the size you want the chalk board to be, then you paint the front with chalkboard paint, found at any craft store or Wal-Mart! Then decoupage your image on the top half of your little chalk board. Then drill holes in the top for your little hanging wire or rope! These are cute and easy to make!
I  bought these little wooden framed chalkboards at the dollar store, then I added my military posters over the top, glued buttons in the corners, and added homespun for hanging them! There's so much you can do with unique printables, or decoupage sheets! :)

Below are some of these printable sheets you can use for these craft projects. I will also place the images in the "Free Printables" section, of my blog!

Just click on the image, when it appears larger on your screen you may right click on the 
image to "save as" or to "print" Have fun crafting, and don't forget the glitter! 

Friday, June 3, 2011

Yummy Little Cinnamon Rolls................


As a child I remember my grandma baking all the time. She was the best cook. Around Christmas she would make fudge, divinity and peanut brittle. And every meal she made, it was always from scratch. I use to love going to her house, because she would always have home made cinnamon rolls waiting for us. I loved her cinnamon rolls. The smell would fill the house, and you could even smell them from just walking up to her door. I think all her neighbors knew when she would have fresh cinnamon rolls for everyone. A couple years ago, I thought "I would love my house to smell like my grandmas cinnamon rolls" So, I created a recipe for these cute little cinni mini's . I messed with the recipe, until I got it to smell the way my dear Grandma Frankie's house would smell when she made her cinnamon rolls. They turned out wonderfully. They were a popular seller when I use to do craft boutiques all the time! They are only for decoration, so even though they look good enough to eat, make sure you tell your guests they are not for eating! These look great setting in a bowl somewhere in your house!


Grandma's Cinnamon Rolls

Ingredients:


  • 1 cup of fine salt
  • 1/2 cup of ground cinnamon, a pinch of cloves, a pinch of nutmeg
  • 1 cup of flour
  • 1/2 cup of water (may add more)
  • For drizzle over the top you need around a cup of melted wax, with cinnamon and 
  • scented oil of your choice, I've used vanilla, or cinnamon roll scented oil.

Instructions:
        
       In a large bowl, combine the salt, cinnamon and the flour
  • Make a well in the salt/flour/cinnamon mixture and add the water
  • Knead until smooth and shape into a ball. You can add some scented oil to this mixture as well.
  • Roll out flat, then add more cinnamon, nutmeg, and clove (or spices you want)
  • Then roll flat piece up just like your making cinnamon rolls
  • Slice into small round rolls, and then bake at around 250-300 degrees 
  • for around an hour or until they are hard.
  • Melt your wax down, add cinnamon, and scented oil, then drizzle over the 
  • top of your cinnamon rolls.
  • When not in use, wrap in plastic or store in an airtight container

  • Have fun making these, and you can add some glitter over the top for the look of sparkly sugar!